

-


常用软件
站-
热门城市 全国站>
-
其他省市
-
-

 15692118659
 晓晓
2018-03-19
来源 :网络
阅读 1021
评论 0
晓晓
2018-03-19
来源 :网络
阅读 1021
评论 0
摘要:很多时候在做完自己的是以后都喜欢来园子里面看看,但多数时候是学习,今天闲来之于也学学写点东西
很多时候在做完自己的是以后都喜欢来园子里面看看,但多数时候是学习,今天闲来之于也学学写点东西
今天在公司做一个上传图片的东西
于是就在gg上找了一个php+swf上传的东西
没有办法公司用的是.net于是就动手改动了
<!DOCTYPE html PUBLIC "-//W3C//DTD XHTML 1.0 Transitional//EN" "//www.w3.org/TR/xhtml1/DTD/xhtml1-transitional.dtd">
<html xmlns="//www.w3.org/1999/xhtml" >
<head runat="server">
    <title>无标题页</title>
    <style>
    .swiff-uploader-box a {
    display: none !important;
}
/* .hover simulates the flash interactions */
a:hover, a.hover {
    color: red;
}
#demo-status {
    padding: 10px 15px;
    width: 420px;
    border: 1px solid #eee;
}
#demo-status .progress {
    background: url(progress.gif) no-repeat;
    background-position: +50% 0;
    margin-right: 0.5em;
    vertical-align: middle;
}
#demo-status .progress-text {
    font-size: 0.9em;
    font-weight: bold;
}
#demo-list {
    list-style: none;
    width: 450px;
    margin: 0;
}
#demo-list li.validation-error {
    padding-left: 44px;
    display: block;
    clear: left;
    line-height: 40px;
    color: #8a1f11;
    cursor: pointer;
    border-bottom: 1px solid #fbc2c4;
    background: #fbe3e4 url(failed.png) no-repeat 4px 4px;
}
#demo-list li.file {
    border-bottom: 1px solid #eee;
    background: url(file.png) no-repeat 4px 4px;
    overflow: auto;
}
#demo-list li.file.file-uploading {
    background-image: url(uploading.png);
    background-color: #D9DDE9;
}
#demo-list li.file.file-success {
    background-image: url(success.png);
}
#demo-list li.file.file-failed {
    background-image: url(failed.png);
}
#demo-list li.file .file-name {
    font-size: 1.2em;
    margin-left: 44px;
    display: block;
    clear: left;
    line-height: 40px;
    height: 40px;
    font-weight: bold;
}
#demo-list li.file .file-size {
    font-size: 0.9em;
    line-height: 18px;
    float: right;
    margin-top: 2px;
    margin-right: 6px;
}
#demo-list li.file .file-info {
    display: block;
    margin-left: 44px;
    font-size: 0.9em;
    line-height: 20px;
    clear
}
#demo-list li.file .file-remove {
    clear: right;
    float: right;
    line-height: 18px;
    margin-right: 6px;
}
    </style>
    <script type="text/javascript" src="mootools.js"></script>
    <script type="text/javascript" src="Swiff.Uploader.js"></script>
    <script type="text/javascript" src="Fx.ProgressBar.js"></script>
    <script type="text/javascript" src="Lang.js"></script>
    <script type="text/javascript" src="FancyUpload2.js"></script>
    <script type="text/javascript">
        /* <![CDATA[ */
/**
 * FancyUpload Showcase
 *
 * @license        MIT License
 * @author        Harald Kirschner <mail [at] digitarald [dot] de>
 * @copyright    Authors
 */
window.addEvent('domready', function() { // wait for the content
    // our uploader instance

    var up = new FancyUpload2($('demo-status'), $('demo-list'), { // options object
        // we console.log infos, remove that in production!!
        verbose: true,

        // url is read from the form, so you just have to change one place
        url: $('form-demo').action,

        // path to the SWF file
        path: 'Swiff.Uploader.swf',

        // remove that line to select all files, or edit it, add more items
        typeFilter: {
            'Images (*.jpg, *.jpeg, *.gif, *.png)': '*.jpg; *.jpeg; *.gif; *.png'
        },

        // this is our browse button, *target* is overlayed with the Flash movie
        target: 'demo-browse',

        // graceful degradation, onLoad is only called if all went well with Flash
        onLoad: function() {
            $('demo-status').removeClass('hide'); // we show the actual UI
            $('demo-fallback').destroy(); // ... and hide the plain form

            // We relay the interactions with the overlayed flash to the link
            this.target.addEvents({
                click: function() {
                    return false;
                },
                mouseenter: function() {
                    this.addClass('hover');
                },
                mouseleave: function() {
                    this.removeClass('hover');
                    this.blur();
                },
                mousedown: function() {
                    this.focus();
                }
            });
            // Interactions for the 2 other buttons

            $('demo-clear').addEvent('click', function() {
                up.remove(); // remove all files
                return false;
            });
            $('demo-upload').addEvent('click', function() {
                up.start(); // start upload
                return false;
            });
        },

        // Edit the following lines, it is your custom event handling

        /**
         * Is called when files were not added, "files" is an array of invalid File classes.
         *
         * This example creates a list of error elements directly in the file list, which
         * hide on click.
         */
        onSelectFail: function(files) {
            alert(files);
            files.each(function(file) {
                new Element('li', {
                    'class': 'validation-error',
                    html: file.validationErrorMessage || file.validationError,
                    title: MooTools.lang.get('FancyUpload', 'removeTitle'),
                    events: {
                        click: function() {
                            this.destroy();
                        }
                    }
                }).inject(this.list, 'top');
            }, this);
        },

        /**
         * This one was directly in FancyUpload2 before, the event makes it
         * easier for you, to add your own response handling (you probably want
         * to send something else than JSON or different items).
         */
        onFileSuccess: function(file, response) {
            var json = new Hash(JSON.decode(response, true) || {});

            if (json.get('status') == '1') {
                file.element.addClass('file-success');
                file.info.set('html', '<strong>Image was uploaded:</strong> Width:' + json.get('width') + 'px, Height:' + json.get('height') + 'px, <em>Mime:' + json.get('mime') + '</em>');
                //alert(response);
            } else {
                file.element.addClass('file-failed');
                //alert(response);
                file.info.set('html', '<strong>An error occured:</strong> ' + (json.get('error') ? (json.get('error') + ' #' + json.get('code')) : response));
            }
        },

        /**
         * onFail is called when the Flash movie got bashed by some browser plugin
         * like Adblock or Flashblock.
         */
        onFail: function(error) {
            switch (error) {
                case 'hidden': // works after enabling the movie and clicking refresh
                    alert('To enable the embedded uploader, unblock it in your browser and refresh (see Adblock).');
                    break;
                case 'blocked': // This no *full* fail, it works after the user clicks the button
                    alert('To enable the embedded uploader, enable the blocked Flash movie (see Flashblock).');
                    break;
                case 'empty': // Oh oh, wrong path
                    alert('A required file was not found, please be patient and we fix this.');
                    break;
                case 'flash': // no flash 9+ :(
                    alert('To enable the embedded uploader, install the latest Adobe Flash plugin.')
            }
        }

    });

});
        /* ]]> */
    </script>
</head>
<body>
   <div id="demo">
<form action="script.aspx" method="post" enctype="multipart/form-data" id="form-demo">
    <fieldset id="demo-fallback">
        <legend>File Upload</legend>
        <p>
            This form is just an example fallback for the unobtrusive behaviour of FancyUpload.
            If this part is not changed, something must be wrong with your code.
        </p>
        <label for="demo-photoupload">
            Upload a Photo:
            <input type="file" name="Filedata" />
        </label>
    </fieldset>
    <div id="demo-status" class="hide">
        <p>
            <a href="#" id="demo-browse">选择图片</a> |
            <a href="#" id="demo-clear">清除图片</a> |
            <a href="#" id="demo-upload">开始上传</a>
        </p>
        <div>
            <strong class="overall-title"></strong><br />
            <img src="bar.gif" class="progress overall-progress" />
        </div>
        <div>
            <strong class="current-title"></strong><br />
            <img src="bar.gif" class="progress current-progress" />
        </div>
        <div class="current-text"></div>
    </div>
    <ul id="demo-list"></ul>
</form>
    </div>
</body>
</html>
这里是前台的
后台处理图片如下
if (Request.Files.Count != 0)
{
HttpFileCollection fc = Request.Files;
for (int i = 0; i < fc.Count; i++)
{
try
{
object s = fc[i];
System.Web.HttpPostedFile pf = (System.Web.HttpPostedFile)s;
pf.SaveAs(Server.MapPath("pic/" + pf.FileName));
//Image img=new Image( );
//img.ImageUrl = Server.MapPath("pic/" + pf.FileName);
//img.Width
//Response.Write("{\"width\":\"10249\",\"height\":\"51\",\"mime\":\"42.4000\"}");
Response.Write("{\"status\":\"1\",\"name\":\"\",\"hash\":\"\",\"width\":250,\"height\":12,\"mime\":\"image\"}");
}
catch
{
Response.Write("{\"status\":\"1\",\"name\":\"\",\"hash\":\"\",\"width\":250,\"height\":12,\"mime\":\"image\"}");
}
}
}
else
{
string s = "something wrong";
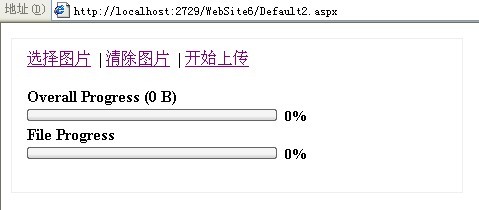
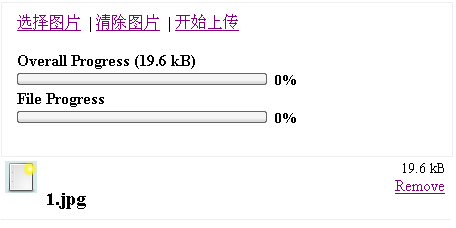
}好了这里就处理完了
应该来说还是很有效果
图:


本文由职坐标整理并发布,希望对同学们有所帮助。了解更多详情请关注职坐标常用软件Flash频道!
 喜欢 | 0
 不喜欢 | 0


您输入的评论内容中包含违禁敏感词
我知道了

请输入正确的手机号码
请输入正确的验证码
您今天的短信下发次数太多了,明天再试试吧!
我们会在第一时间安排职业规划师联系您!
您也可以联系我们的职业规划师咨询:

版权所有 职坐标-一站式AI+学习就业服务平台 沪ICP备13042190号-4
上海海同信息科技有限公司 Copyright ©2015 www.zhizuobiao.com,All Rights Reserved.
 沪公网安备 31011502005948号


 资料领取
资料领取

 答疑解惑
答疑解惑

 技术交流
技术交流

 职业测评
职业测评

 面试技巧
面试技巧

 高薪秘笈
高薪秘笈


